Arduino Project: HTML to LCD
The original source code for this project can be found Here.
WHAT YOU NEED:
- Arduino (I use the UNO, but I think the older revisions should also work)
- An Ethernet Shield
- 16×2 Basic Character LCD (There are many more colour options than just white on black)
- An Ethernet cable (I just used an old one lying around)
- A Breadboard or some other means to connect the LCD to the Arduino and one 2.2 kΩ resistor
WHAT IT DOES:
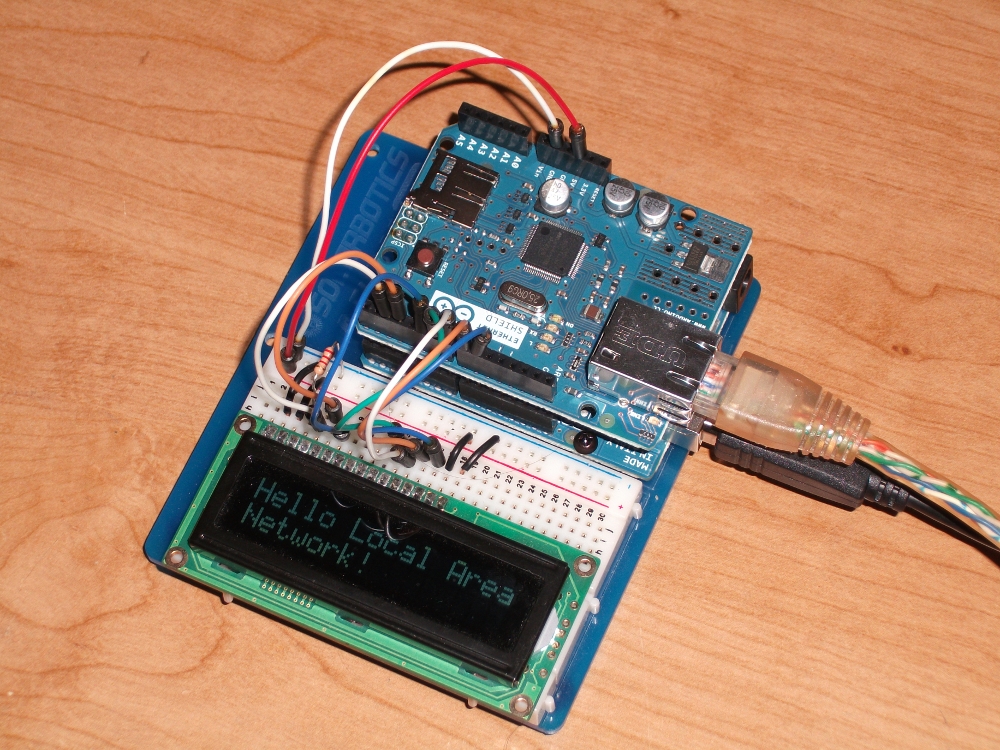
This project combines the above to turn the Arduino into web server which is hooked up to the LCD. It produces a simple HTML web page, from which the user may see what text is currently displayed on the LCD, and provides them the opportunity to change the text using simple input forms. The hardware side of this project is fairly simple, and there were no physical hacks or modifications that needed to be made. The real challenge to this project were working within the limitations of the Arduino as a computing device.
SETUP AND OPERATION:
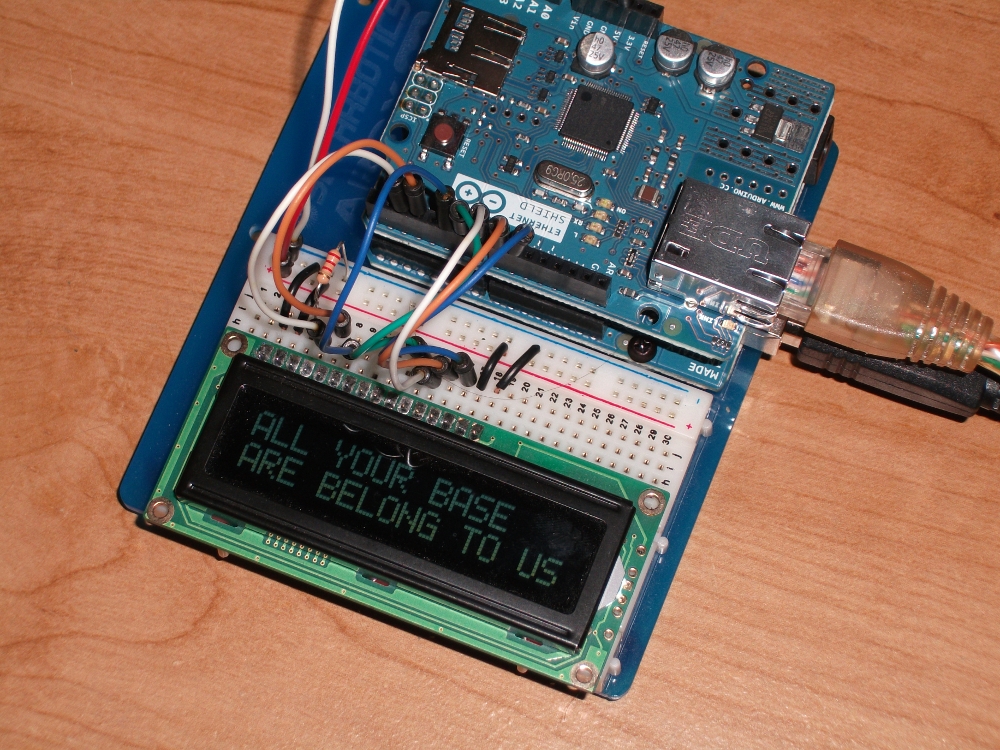
As we can see, the Ethernet shield is plugged into the Arduino, and is hooked up to the breadboard and LCD according to the scheme outlined in the comments of the source code. This one is completely set up and running, since there is already some text displayed on the LCD. The Arduino’s digital pins 4, 10, 11, 12 and 13 are left free since they are utilized by the shield. All the remaining pins are used by the LCD, so unfortunately this means all of the digital IO pins are used which restricts future additions to this project . The Arduino is also being powered over the USB cable, since this allows me to use the serial monitor to debug, and also because the Wiznet chip and voltage regulator get very hot when my 9V wall adapter is used. I have read that this may be because the shield draws a fair amount of current, and the linear voltage regulator reduces the voltage in accordance with the equation P = I*ΔV. The power is proportional to the current draw, and it is dissipated by the voltage regulator in the form of heat.
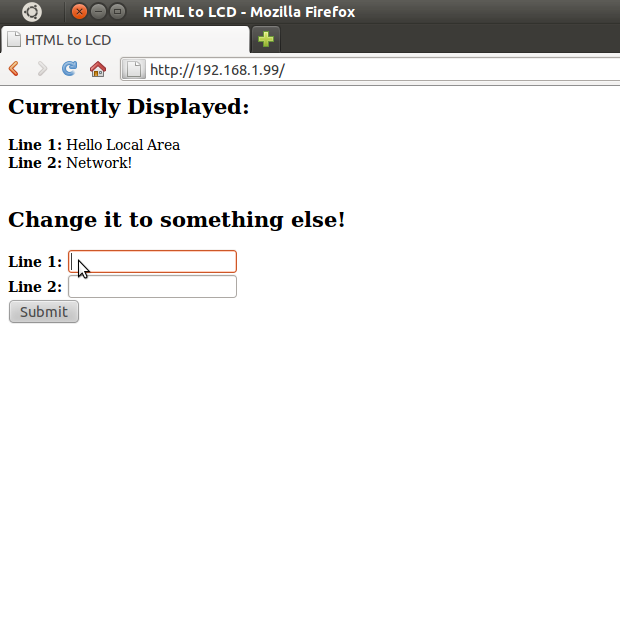
With those notes aside, we can connect to the web page by typing in the local network IP address of the Arduino, which I have set up to be fixed using my router’s DHCP reservation functionality. The Arduino did not automatically receive an IP address when the Ethernet cable was first plugged in, so it was necessary to manually add the it to the router’s client list using the mac address on the underside of the shield.
On the web page served by the Arduino it tells us what is currently displayed by the LCD, and it provides us with two boxes to enter more text, one for each row. Each row is limited by the HTML code to 16 characters which provides instant feedback about the limitations of our setup to the user.
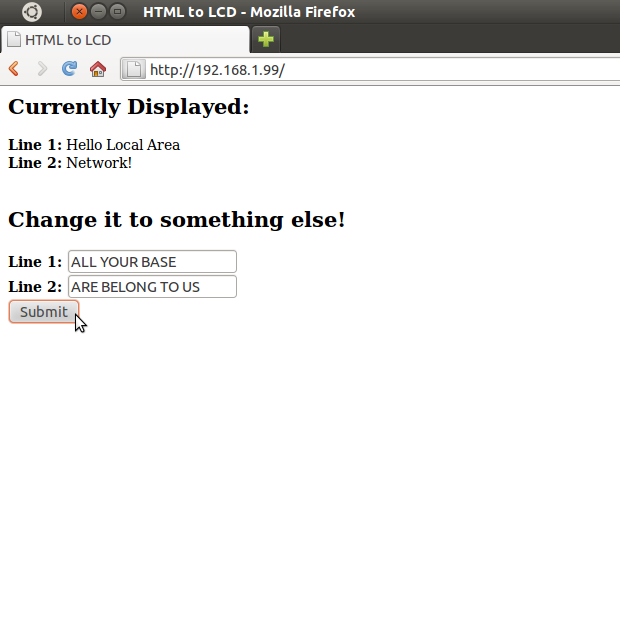
Typing in a couple of new lines and clicking the submit button causes the page to refresh and update with what we just entered! In a related issue, due to the RAM limitations of the Arduino and the way symbols are encoded for a URL (a % sign followed by two Hex digits), symbols initially use three times as many bytes as normal alpha-numeric characters. Therefore, if a user were to enter nothing but symbols in each field, the Arduino would crash due to memory issues. To solve this problem I added some code to limit the length of the raw text accepted, but this means that if a user enters too many symbols, the second line will be truncated. In fact, if nothing but symbols are entered into both lines, the second line will be truncated to nothing. It is an unsatisfactory solution, but it’s not an issue if the user uses symbols responsibly.
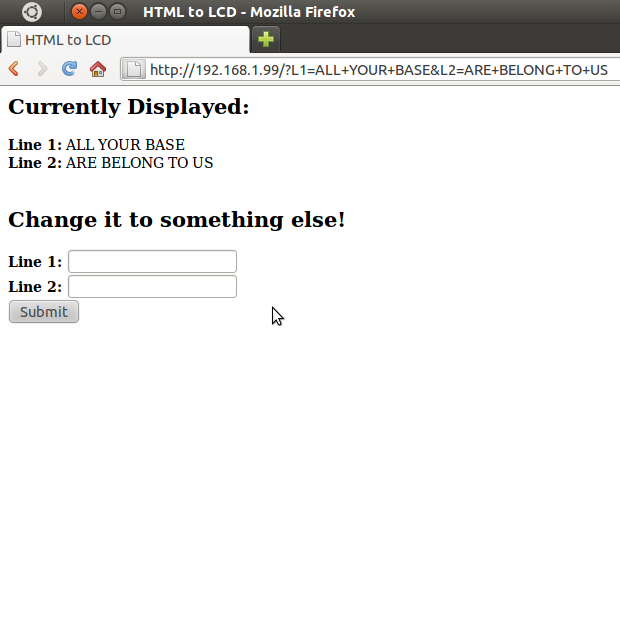
Putting these issues aside and returning to our example, we can see that the the web page is now displaying what we entered earlier, and that the LCD also reflects the changes made on the web page.
While my Arduino is only hooked up to my local area network, it is possible to release it into the wild world of the Internet, though there is some risk (which I lack the expertise to properly assess) to doing so on your home network. There are some instructions for implementing this at http://sheepdogguides.com/arduino/art5serv.htm involving changing the settings on your home router and utilizing DynDNS to get a readable and static domain name.
The most difficult aspect of this whole project was without a doubt managing the heavy use of strings within the Arduino’s small amount of RAM. Lots of work went into preventing any major or obvious memory leaks, but I am not entirely sure that I have gotten them all. To ration the memory effectively, I also utilized the ability of the Arduino to store constants in flash memory for the strings of HTML code that are sent to the client’s browser. This means I have at most only a single line of HTML stored in RAM at any time.
That wraps up my first post and first major Arduino project that involved some real coding and which was more than just random experimentation and tinkering. There is still some work that could be done debugging, and I intend to work on some extreme and border conditions to see if there are any bugs remaining that will cause it to crash or do some other bad thing.
(what fun is it if you don’t try to break it?)
As a reminder, the source code for this project can be found Here.
